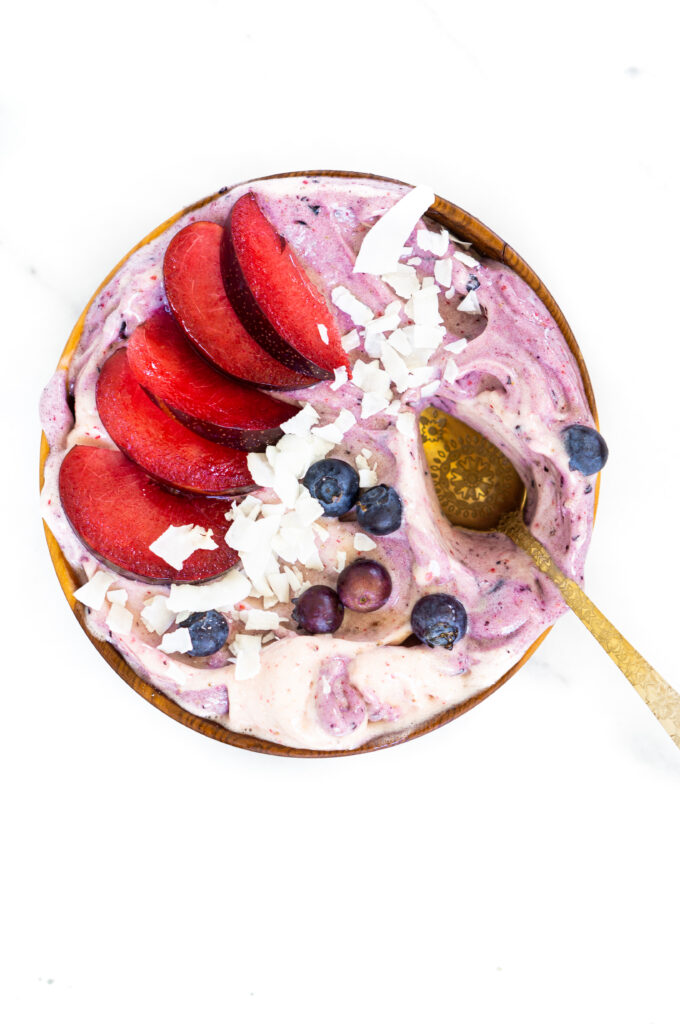
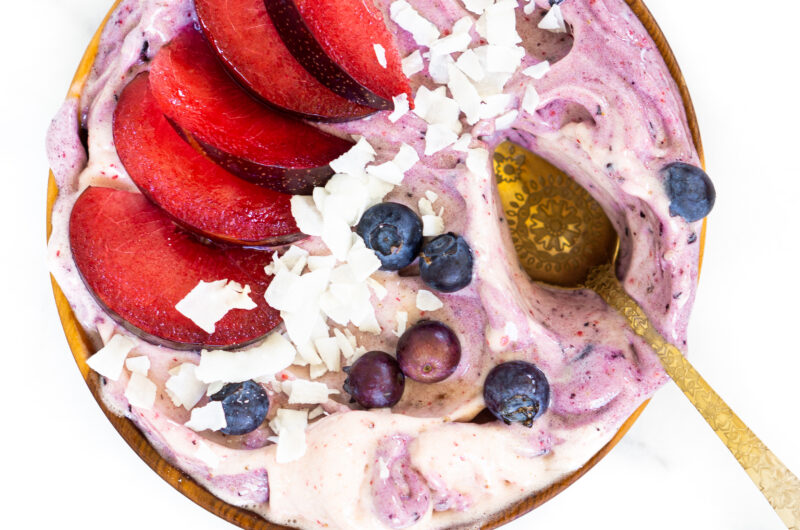
Slutty Brownies

While some of my classmates celebrated the end of exams by going out for drinks, playing StarCraft until their eyes pop out, going on a fro-yo binge, or going on a shopping spree, I baked some of these infamous slutty brownies. No, I didn’t come up with the name of these naughty treats made with chocolate chip cookie dough, brownies, and Oreo cookies, but they have been popping up everywhere lately. Where did they come from? Duncan Hines has a recipe for these slutty brownies, but they use their own mixes to make them and I wanted to make them from scratch. They became even more famous a few months ago when Jessica Simpson announced on The Tonight Show that she was craving slutty brownies during her pregnancy. I refuse to calculate how many calories are in each serving for this recipe, because frankly I don’t want to know!! I feel a heart attack coming on just looking at one. But they are sooo good. Everything in moderation right? ;)

By the way, I used my recipe for Better than Box Fudge Brownies for the brownie part.

Slutty Brownies
5.0 from 1 reviews
Print
Type: Dessert
Prep time: 25 mins
Cook time: 45 mins
Total: 1 hour 10 mins
Serves: 16
Ingredients
  • Cookie Dough
  • 1 1/4 cups all-purpose flour
  • 1/2 tsp baking soda
  • 1/2 tsp salt
  • 1 stick unsalted butter (1/2 cup) at room temperature
  • 1/3 cup granulated sugar
  • 1/3 cup brown sugar
  • 1/2 tsp vanilla extract
  • 1 egg
  • 1 cup semi-sweet chocolate chips
  • Brownie Batter
  • See recipe above for my fudge brownie from scratch recipe
  • 16 Oreo cookies
Instructions
  1. Preheat oven to 350 degrees F.
  2. Whisk together dry ingredients (flour, baking soda, salt) in a bowl.
  3. In a standalone mixer bowl fitted with paddle attachment, cream together butter and sugar on medium speed.
  4. Add egg and vanilla and mix on low until blended.
  5. Gradually add dry ingredient mixture to mixer and blend on low.
  6. Spoon into an 8×8 glass dish or baking pan with a spatula and flatten. Place in refrigerator until brownie batter is made.
  7. Top with Oreos in 4 rows (4 in each row).
  8. Pour brownie batter on top.
  9. Shake around to make sure batter is evenly distributed.
  10. Bake in the oven for 45-55 minutes (check with a fork for doneness) depending on how “gooey” you want the center to be.
  11. Let cool 15 minutes, then cut into squares and serve with ice cream.
Makes 16 brownies

This post is sponsored by:


See this post on:

Our Delightful Home

Pin It

Baked Organic Zucchini Fries

MMM I discovered my new favorite non-guilty snack food today! Once again I bought the huge organic zucchini pack at Trader Joes this week, and a few days have gone by and I haven’t even opened it yet. I had to use up some of these zucchini! The choice was between baked zucchini chips or trying out a new recipe: baked organic zucchini fries. They are crispy on the outside and soft on the inside-almost like sweet potato fries. This is a fun appetizer to make for friends, or keep them all as a snack for yourself! You can play around with different seasonings. Zucchini is naturally very plain so these fries will need some flavor added to them. Some ideas are paprika, garlic, onion powder, salt, pepper, Parmesan cheese, Italian seasonings… Its a good idea to google some videos on how to easily slice zucchini into fries. I hope everyone is having a relaxing Sunday afternoon. Enjoy! XoXo

Baked Zucchini Fries
5.0 from 1 reviews
Print
Type: Appetizer
Prep time: 15 mins
Cook time: 20 mins
Total: 35 mins
Serves: 4
Ingredients
  • 3 organic zucchini, washed
  • 1 cup plain bread crumbs
  • 2 egg whites (can sub for full eggs to avoid waste)
  • 2 tbsp paprika
  • 1 tsp garlic salt
  • 1 tsp onion powder
  • Salt and pepper to taste
Instructions
  1. Preheat oven to 400 degrees F.
  2. Slice both ends off of the zucchini, then slice them in half.
  3. Slice into matchsticks and dip into egg whites in a bowl (or beaten egg if using whole eggs).
  4. Add bread crumbs and seasonings to a large ziplock bag.
  5. Add dipped zucchini to bag a handful at a time and shake to coat.
  6. Place one-by-one to a greased baking sheet.
  7. Bake for 20 minutes.
  8. Serve immediately with marinara sauce (they are best when hot out of the oven, yum!).

This post is sponsored by:

Pin It

The Original Butter Bell Crock


As I have stated before, as a food blogger I am always getting opportunities to share new products with my readers. I turn down 90% of the offers and only choose the ones I find interesting to write about. While on my hunt for items to put on my registry, I came across this promotion for these porcelain Butter Bell crocks and found them really unique. I don’t know about you, but my butter keeper is pretty basic and it would be nice to have this little addition to my kitchen. They are made by a family owned business based in Los Angeles, CA (near my hometown!). Right now they are having a “Buy 2 Get 1 Free” promotion…they make great gifts for your favorite cook.


This sponsorship is brought to you by The Butter Bell Crock who we have partnered with for this promotion.

Whole Wheat Pizza Pockets

Hello my friends! I know it has been a while since my last post, but I have been in the middle of midterms (nope, not over yet :( ) so I haven’t had much time to play in the kitchen. I did make some of these whole wheat pizza pockets because they are a great study snack or lunch served with a salad. The best part is you can freeze them and reheat them in the oven at 300 for 15 minutes and they taste freshly made. I love experimenting with different fillings. This time I used artichokes. Be careful if you try it with spinach or any really wet vegetable because I am not sure if they will turn out as crispy (let me know if you try it!). You can also play around with different sizes-mini ones make great appetizers. These come out of the oven with crispy edges and a firm shell (thanks to the egg wash)…yum yum! I never seem to add enough sauce in the middle though, so it is a good idea to serve with an extra side of marinara sauce for dipping. One last note: I realize most people use yeast packets which equal 2 1/4 tsp of yeast, and this recipe uses 1 tsp (I use the jar kind since I use so much of it!). I am curious to find out how they will turn out with the 2 1/4 tsp, but I was afraid they would be too doughy…and with the 1 tsp they came out PERFECT. Maybe I will try with the 2 1/4 tsp sometime though, and if I do I will update this post and let you know!

So I almost completed my wedding registries, yay! At one point I realized there was tons of kitchen stuff on there-oops, Fabi would LOVE that…hehe ;) Oh, and yes, I painfully removed the $800 (on sale!) DeLonghi automatic espresso maker….sigh….someday…. If you notice in the pictures below, I had to use a paintbrush (never used for painting) as a pastry brush when brushing the egg wash onto the pizza pockets because I don’t even own a proper pastry brush. I realized after buying a whole painting set in college that my baking & cooking skills are much better than my painting skills…At least the paint brush has now gone to good use :) It is so hard trying to pick out things you will have for your whole life, its like it has to be perfect. My grandma was telling me she still has some fine servingware that she received as gifts for her wedding!

What are your favorite pizza pocket fillings?? XoXo

Whole Wheat Pizza Pockets
Print
Type: Appetizer
Prep time: 45 mins
Cook time: 20 mins
Total: 1 hour 5 mins
Serves: 8
Ingredients
  • 1 tsp dry rapid rise yeast
  • 1 cup warm water
  • 1 tsp sugar
  • 1 tsp salt
  • 2 tbsp olive oil
  • 2 1/2 cups white whole wheat flour (or 1 cup white, 1 1/2 whole wheat)
  • 1 egg
  • 1 jar pizza sauce (or homemade mmm)
  • Shredded mozzarella cheese
  • Parmesan cheese (for topping)
  • Marinara sauce (for dipping)
  • Filling ideas
  • Artichoke hearts
  • Mushrooms
  • Ham
  • Bell pepper
Instructions
  1. Add yeast, sugar and warm water to a standalone mixer bowl, fitted with hook attachment.
  2. Allow yeast to proof for 7 minutes, or until poofy.
  3. Add olive oil, salt, and 1 cup of flour and mix until blended on low speed (setting 2 on KitchenAid).
  4. Slowly add remaining flour and mix for 10 minutes to knead on low speed.
  5. Remove from hook and leave in bowl, covered with a towel. Let stand 30 minutes.
  6. Preheat oven to 400 degrees F.
  7. Roll out very thin on a floured surface and cut 6 inch by 6 inch (or desired size) squares with a pizza cutter.
  8. Add 1-2 tbsp pizza sauce, toppings, and 1-2 tbsp mozzarella cheese to the center of each square.
  9. Brush the sides with egg wash and carefully fold over each other in a triangle shape and press together.
  10. Use a fork to flute the edges to further merge them together and place on an ungreased baking sheet.
  11. Beat the egg in a small bowl with a fork.
  12. Brush the tops of the pizza pockets on the baking sheet with egg wash, and sprinkle Parmesan cheese over the tops if desired.
  13. Bake about 20 minutes. Tops should be golden brown and hardened with tapped with your finger.
  14. Remove from the oven and allow to cool a few minutes before serving.
  15. Serve with marinara dipping sauce.
Makes ~16 palm-sized pizza pockets

 
This post is sponsored by:

See this post on weekend potluck!

Pin It

Chocolate Soufflés for Two

I have been terrified of making this delicate French dessert ever since I saw that scene in the movie “Because I Said So” with Mandy Moore when she is baking chocolate soufflés and when she opens the oven they collapse and are ruined. I decided if I was going to try it, I better look to the experts at The Food Network. I only changed the recipe a little. To my surprise, the soufflés came out of the oven perfectly tall and poofy and stayed that way for a few minutes (enough time to serve and dig in!). When they started to sink a few minutes after serving, my heart sank and I thought I failed. I did some reading, and soufflés always fall and don’t stay up (unless you way over-bake them of course) because the bubbles in side need heat to keep the poofy shape, and once they cool they “deflate” to some extent. Here are some tips to avoid getting sinking soufflés right out of the oven (what you DON’T want): 1) Make sure you don’t overbeat the egg whites-right when they become poofy, stop. 2) Do not overstir the egg whites into the chocolate…fold them in gently with a spatula until just blended. 3) Don’t underbake. I got lucky with this recipe, but as always practice makes perfect!

Time to study for my pharmaceutical chemistry & pharmacology midterms…but first I think I will go for a run since its a beautiful day here in San Francisco and I need to run off that delicious soufflé I just devoured. :/

Recipe adapted from The Food Network, 2007.

Chocolate Soufflé for Two
Print
Type: Dessert
Prep time: 40 mins
Cook time: 20 mins
Total: 1 hour
Serves: 2
Ingredients
  • 1/3 cup semisweet chocolate chips
  • 1 tbsp unsalted butter
  • 1/2 tsp vanilla extract
  • 1 large egg yolk
  • 1 tbsp warm water
  • 2 tbsp and 2 tsp granulated sugar
  • 2 large egg whites, room temperature
  • 1/8 tsp fresh lemon juice
  • Pinch of salt
  • Pinch of cinnamon
  • Confectioners’ sugar for garnish
Instructions
  1. Grease 2 ramekins with soft butter, then coat with sugar.
  2. Place ramekins in the freezer and chill for at least 30 minutes.
  3. Remove all items you will need and set on countertop.
  4. Place an oven rack in lower third of the oven and preheat to 400 degrees F.
  5. Add the chocolate and butter to a Little Dipper crockpot and cover, or in a medium heatproof bowl placed over a saucepan filled with an inch of simmering water (not touching).
  6. Stir the chocolate occasionally until melted and smooth.
  7. Remove from heat and stir in vanilla extract and cinnamon. Set aside.
  8. In a large bowl, add egg yolk and warm water and beat until frothy. Gradually add 2 tsp sugar, and continue beating about 5 minutes.
  9. Gently fold the yolks into the chocolate mixture.
  10. Remove ramekins from freezer.
  11. Add egg whites to the bowl of a standing mixer with whisk attachment and add lemon juice and pinch of salt.
  12. Beat on medium until frothy, then gradually add 2 tbsp of sugar and increase speed to high.
  13. Beat until the whites hold a stiff peak then stop.
  14. Gently fold about a third of the egg whites into the chocolate to lighten, then fold in remaining whites until just blended.
  15. Carefully spoon the souffle mixture into the ramekins, and place on a baking sheet.
  16. Bake until the soufflé rises and when the top is touched with your finger it springs back, about 18 to 20 minutes.
  17. Remove from oven, dust with confectioners’ sugar and serve immediately.

This post is sponsored by:

Pin It